It is more than five years ago I published the original article on various building blocks for Agile Business Intelligence. Two years later I published version 2.0 (German article, English article). Two building blocks envisioned in this model are „Continuous Integration“ and „Push Button Deployments“. Both, as a professional but as well as a consulting company we went on a journey together with our customers working on the different building blocks, mostly from left to right. In the meanwhile we have arrived in the area of „Agile infrastructure & patterns“ and I took some time to think about a blueprint for CI/CD (Continuous Integration and Continuous Deployment) for WhereScape (our preferred data warehouse automation solution) based on Azure DevOps as well as BiG EVAL (our preferred test automation solution). In this blog post I’ll start explaining some of the terminology and detail on the concept of the build process. In upcoming blog posts I’ll have a look at the release process and go into some of the technical details.
Overview & Terminology
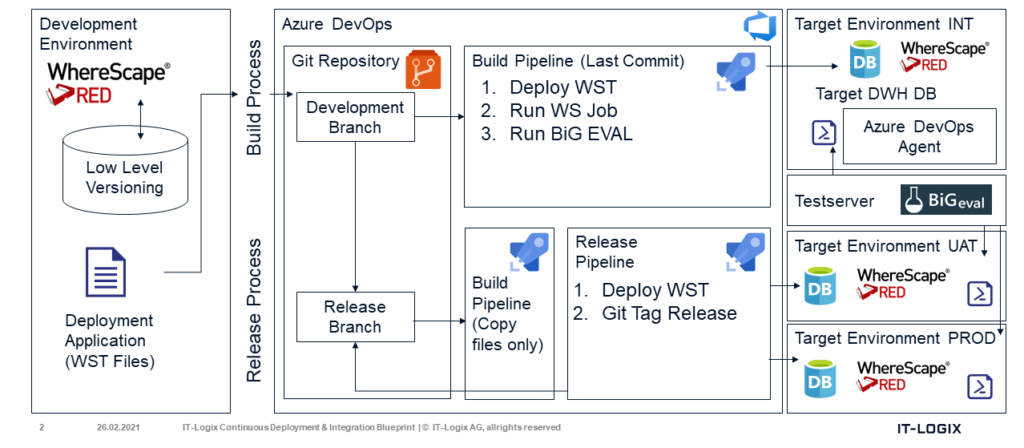
The blueprint assumes a four system landscape:
- A (shared) development environment, that means all the developers are working on the same dev environment.
- An integration environment. Whereas in the dev environment we are working with small data amounts, the goal of the integration environment is to load regular amounts of data and continously run (regression) tests on indiviual increments as well as on the whole system.
- An UAT environment. At some point you want to release certain functionality into production. This is where the term „release“ comes into play. A release is a certain set of your data warehouse artefacts you want to push into production. But before this, you want your product owner and business users to do some final tests on the user acceptance test environment.
- A production environment. Once everything is fine on the UAT environment you want to publish the artefacts to the production environment.
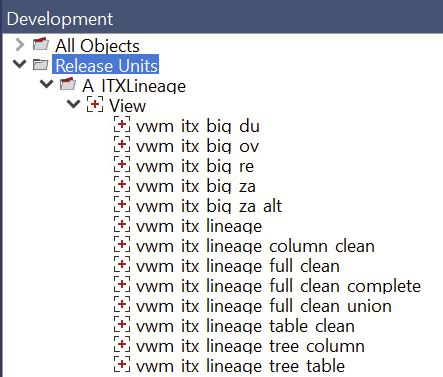
The blueprint is based on the concept of so called „release units“. A release unit is a logical group of artefacts in WhereScape RED which can be run / loaded indepentently, e.g. all artefacts which are necessary to load a certain table in the Persistent Staging Area or the core or data mart layer. Therefore, every release unit should also contain a WhereScape job which defines in which order the objects in the release unit have to be loaded. I typically use a RED project folder to include all the objects for a specific release unit (including job and parameter objects).
I suggest cutting the release units as small as possible (and of course as big as necessary), this simplifies the debugging both during development but especially during deployment. Given the four system landscape above, the goal of every developer should be that a release unit is deployed as soon as possible to the integration environment in order to check if the job runs well with the regular amount of data and verify the result using test automation.
The blueprint consists of three major processes:
- Develop: The development work takes place in WhereScape RED (and before that perhaps in 3D) with its own „low level versioning“, that means every single (metadata) object is versioned in the WhereScape repository, either automatically on any change or by purpose when the developer chooses to create a new version.
- Build: Once a release unit is ready (that means there is an initial version of a WhereScape job loading certain objects), the build process has the goal to deploy the release unit to the integration environment, run the job of the deployed release unit and finally execute a corresponding test suite in BiG EVAL.
- Release: Once the team decides that there is enough functionality available to release it into UAT and production, the release process is started. That means that a certain set of release units is chosen to be deployed to UAT and later into production. Compared to the build process there is less automation in place here, because there should be some manual testing and approvals before the release is deployed into production.
Using Azure DevOps, we can automate the build and release process based on four major building blocks:
- Git repository and versioning: Git is an open-source distributed version control system which is used by default by Azure DevOps. You can use various client tools like Source Tree or an integration in Visual Studio. In my CI/CD blueprint we are using Git for versioning the .wst files of the deployment applications. A core concept (not only in Git) is branching which we will use when it comes to release.
- Build pipelines: A build pipeline defines steps that are executed after each other once the pipeline is triggered. For software development „build“ means usually to compile your source code and create the executable. In our case, the build pipelines is used to deploy the deployment application and run some further steps. The default trigger for a build pipeline is a „commit“ to a given branch in the Git repository.
- Release pipelines: Release pipelines are similar to build pipelines, though for software projects it is mainly about deploying an executable to a certain environment. Depending on the deployed system there are various forms of release pipelines. For our case we will use „Classic“ release pipelines.
- Agent: While Git and the pipeline engine are running as SaaS, the Azure DevOps agent is sitting on the environment which is used to execute the build and release tasks. There are Microsoft hosted agents, that means that e.g. during the build process a new VM is spun up including the agent and a certain software development kit. As there is no default image containing WhereScape software, we have to use a self-hosted agent. This one is installed on a machine on which WhereScape RED is installed too.
The Build Process
The build process starts with creating a new deployment application in RED. We are using a simplified release unit which contains only views (our IT-Logix set of lineage views which are extending the WhereScape lineage to references only available in join statements). As written above, I suggest creating a project folder for every release unit, hence you can easily select the objects when creating the deployment application:
To create a new deployment application, the easiest way is to right click the project folder:
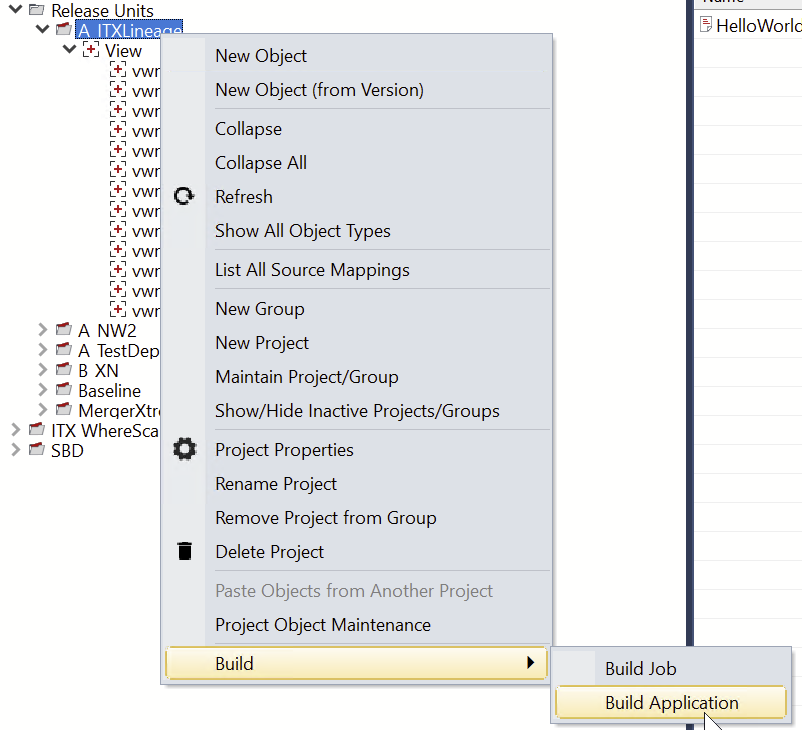
Build Application
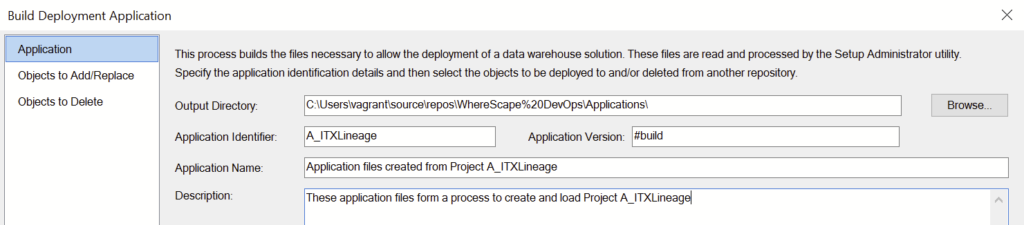
In the next screen choose your local git repository folder, in my case I have created an Applications folder within the git repo. The deployment application should always have the name of the release unit. As the application version you can always use „#build“. Why don’t a version number? Git uses the file name in order to compare new files with existing files in the repository. Most Git tools as well as the Azure DevOps view on it provide the capabilitie to easily visualize differences between two versions of the same file. In order to track changes for a given release unit, we must make sure we are always using the same application version like #build.
Once the deployment application is created, let’s jump to the Git tool, in my case Visual Studio. As you can see, the new files were already identified:
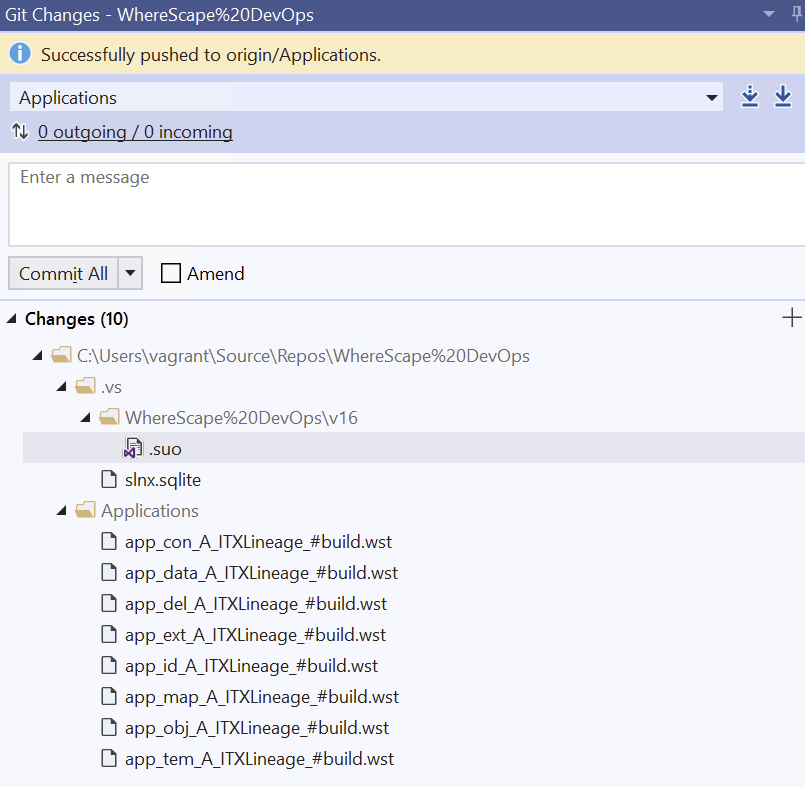
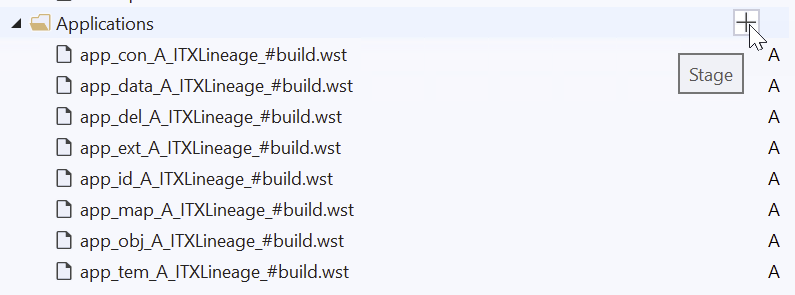
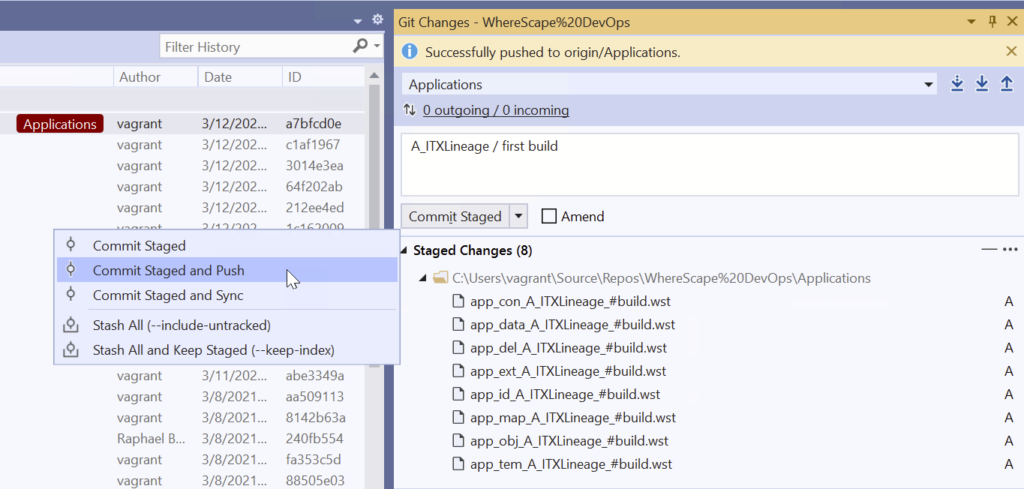
We are adding the files to the „stage“, write a commit message and push the commit to the remote repository in Azure DevOps:
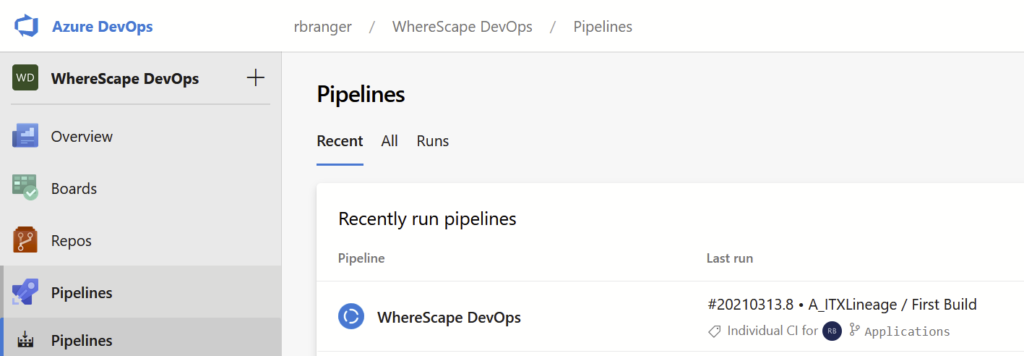
Now let’s switch to Azure DevOps. In the pipelines section you’ll see that our build pipeline was already triggered by the recent commit:
Let’s have a closer look at the latest pipeline run:
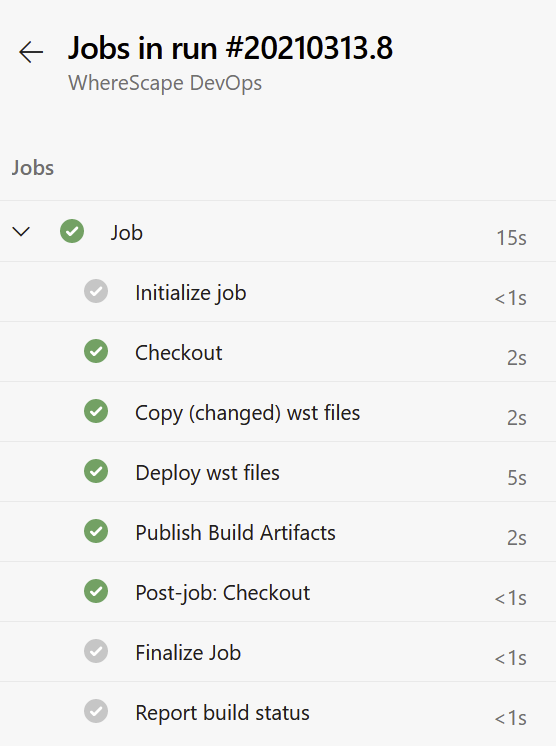
The checkout steps downloads the git repository to the „sources directory“ on the machine where the Agent is running. Afterwards there are two custom steps in this pipeline specific to our WhereScape case: „Copy (changed) wst files“ as well as „Deploy wst files“. In the copy wst files we are fetching all wst-files from the latest commit and copy them from the sources directory in to the „build“ directory. The build directory is also on the agent machine and will be truncated before every pipeline run.
There is a special aspect to consider when using WhereScape deployment applications in conjunction with Git and a generic build number: If you create the deployment application a second or third time (because you did some changes in RED), not all of the eight wst files are necessarily changed. During the commit process above you’d only commit the changed files. But in order to successfully deploy the deployment application, we always need all eight files. The copy script will therefore „fill up“ missing wst files for a given deployment application from the source directory.

As you can see in the screenshot above, the generic version number #build was replaced by the pipeline scripts with the current build number. As this happens only in the (temporary) build directory, the original files in the Git repo are not changed.
In the next step the actual deployment of the deployment application is done using the redcli (RED Commandline Interface).

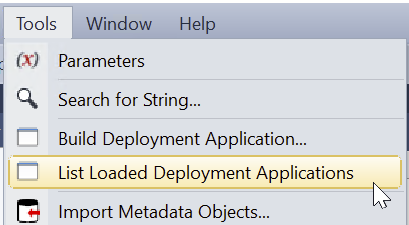
As a final result we can check if the deployment in the integration environment by listing „Installed Deployment Applications“:

As you can see, the version number equals the build number and helps you track back the pipeline run which deployed the release unit. This way you can easily have a look at the log files etc.
As you can see in the blueprint overview at the beginning, there are some further steps planned which I haven’t yet integrated into the build pipeline:
- Run the WhereScape job which is included in the release unit (if any)
- Run a test suite in BiG EVAL once the WS job was run
Summary & Outlook
In this blog post I introduced a blueprint for CI/CD for WhereScape based on Azure DevOps and BiG EVAL. I explained some of the basic terminology in order to understand the blueprint and the two major processes: the build and the release process. We went through the build process following a simple example. In the next post we’ll have a look at the release process. In yet another post we’ll look at some of the technical details for the various Powershell scripts used as part of the pipelines.
Want to see the CI/CD blueprint in action? Then tune in to the WhereScape DACH user group next Wednesday, March 17th. I’ll do a live demo of the whole process. Registration is free, just register on the Meetup page.
What is your experience with CI/CD and WhereScape? Do you follow a similar or different approach for automated deployment of WhereScape artefacts? I’m looking forward to your feedback in the comments section!